Lets Encrypt: Difference between revisions
Jump to navigation
Jump to search
| Line 5: | Line 5: | ||
1. Log in to your hosting panel at hosting.xmission.com | 1. Log in to your hosting panel at hosting.xmission.com | ||
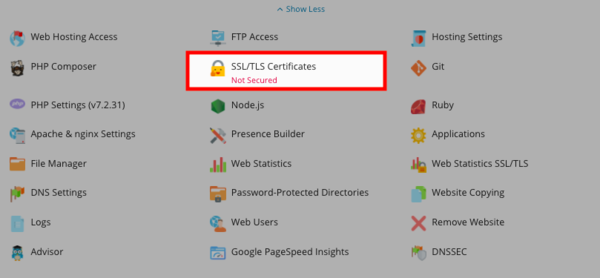
2. Find the " | 2. Find the "SSL/TLS Certificat" button under the website you are wanting to add a self-assigned Let's Encrypt SSL certificate for | ||
[[File:Letsencrypt.png|600px]] | [[File:Letsencrypt.png|600px]] | ||
3. | |||
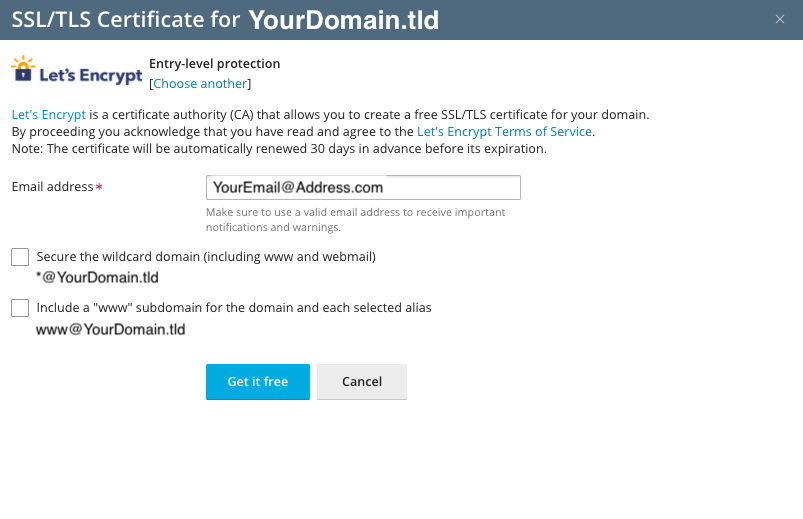
3. Fill in a contact email in case of a lost key, or you are in need of recovery | 3. Fill in a contact email in case of a lost key, or you are in need of recovery | ||
Revision as of 10:00, 9 June 2020
Let's Encrypt!
Let's Encrypt is a free SSL/CA service created by the Internet Security Research Group (ISRG). It allows its users to create their own SSL/TLS certificate to have secure HTTPS connections to their websites through a free service in their Shared Hosting panel. If you would like to know more about the ISRG or the Let's Encrypt product, please see https://letsencrypt.org/about/ .
How to create your own SSL certificate using Let's Encrypt
1. Log in to your hosting panel at hosting.xmission.com
2. Find the "SSL/TLS Certificat" button under the website you are wanting to add a self-assigned Let's Encrypt SSL certificate for
3.
3. Fill in a contact email in case of a lost key, or you are in need of recovery
- If you wish to have your www website covered by the certificate, check the box "Include www.yourdomain.com" as an alternative domain name."
4 Click Renew
- Administration/Logging in
- Adding a Domain
- Adding MySQL Databases
- Adding/Managing DNS Records
- Managing Domain/Users
- Managing FTP Access/Users
- PHP Settings
- Previewing the Website
- Secure Your Sites
- Web Statistics
Additional Development Help
Applications
Domain Management

