Adding a Domain Forwarder
Plesk Unlimited Hosting: Adding a Domain Forwarder
You can add a new domain name to forward to another domain or even a directory within another domain. First, ensure you are logged into your account at http://hosting.xmission.com.
- From the Control Panel, click on the "Websites & Domains" tab near the top of the screen.
- Near the bottom of the screen, click the "Add New Domain" button.
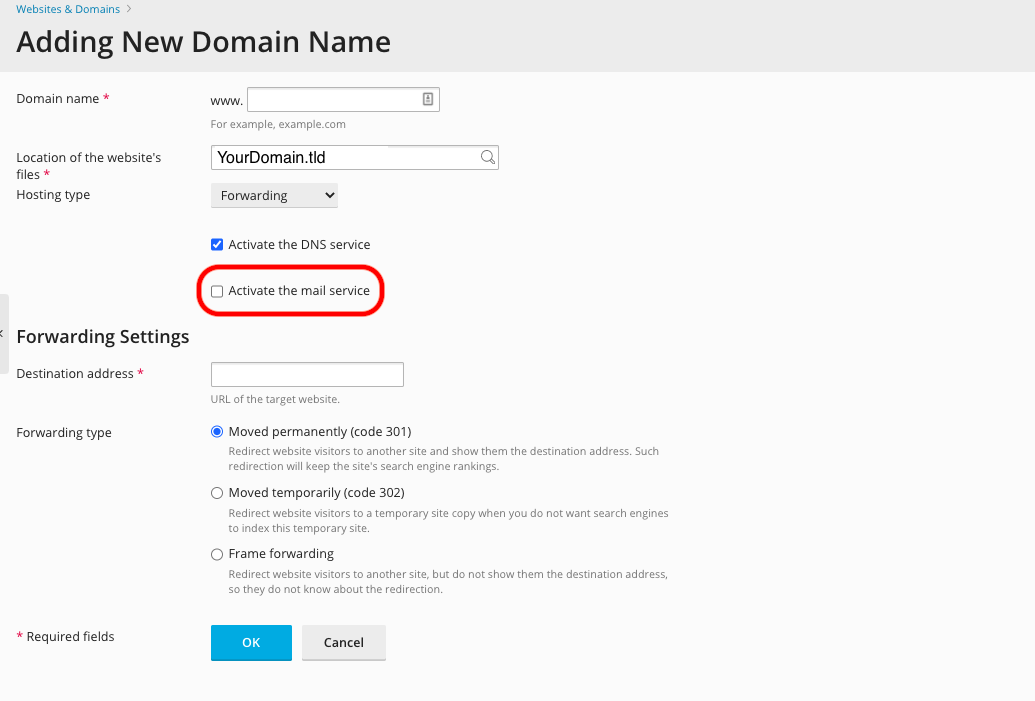
- On this screen, you will need to enter the following highlighted pieces of information. A brief description of each follows the image.
- Domain name: This is the name of your new domain. In this example, we would be adding the domain "example-domain.com."
- DNS Server Configuration: Most likely, you will be using XMission for DNS and so the box shown above should be selected.
- Hosting Type: Select "Forwarding."
- Destination address: This is where the new domain will forward to. You can have it forward either to another domain entirely or a subdirectory of another domain. In this example, our forward for "example-domain.com" will forward people to the subdirectory "example" at "xdesign.com."
- Forwarding type: Select "Standard forwarding" if you want the URL in the address bar of the visitor's browser to show the real address of the forward (e.g. "xdesign.com/example"). Select "Frame forwarding" if you want the forward to appear as the domain you are adding (e.g. "example-domain.com").
- Once you've entered the correct information for your new domain, simply click "OK." You will see the following text indicating your new domain has been created successfully!
- Administration/Logging in
- Adding a Domain
- Adding MySQL Databases
- Adding/Managing DNS Records
- Managing Domain/Users
- Managing FTP Access/Users
- PHP Settings
- Previewing the Website
- Secure Your Sites
- Web Statistics
Additional Development Help
Applications
Domain Management
