Difference between revisions of "Secure Your Sites"
(→Assign your SSL Certificate) |
|||
| (3 intermediate revisions by the same user not shown) | |||
| Line 4: | Line 4: | ||
SSL certificates secure transfer of sensitive data from visitors to your website, and also verify the site identity. Below you can find two lists of SSL certificates. The first one showing certificates that you use for securing your websites and the other one showing certificates that you purchased. | SSL certificates secure transfer of sensitive data from visitors to your website, and also verify the site identity. Below you can find two lists of SSL certificates. The first one showing certificates that you use for securing your websites and the other one showing certificates that you purchased. | ||
| − | * From | + | * From side panel click on "'''Websites and Domains'''". |
[[File:Plesk_tabs_new.png]] | [[File:Plesk_tabs_new.png]] | ||
| − | * | + | * Click on the domain you wish to use your SSL Certificate on. |
| − | * Next choose "'''SSL/TLS Certificates'''". | + | * Next choose "'''SSL/TLS Certificates'''" under '''Security'''. |
| − | [[File: | + | [[File:PleskSSL-1.png|600px]] |
| − | * | + | * To manage or add a CSR choose ''' Download or remove existing certificates''' - '''Manage''' towards the bottom of the page. |
| − | + | [[File:PleskSSL-2.png|600px]] | |
| − | [[File: | ||
* Next choose "'''Add SSL Certificate'''". | * Next choose "'''Add SSL Certificate'''". | ||
| Line 44: | Line 43: | ||
* Click on the Certificate name to view your CSR. | * Click on the Certificate name to view your CSR. | ||
| − | [[File: | + | [[File:PleskSSL-3.png|600px]] |
* Locate the CSR section on the page, and copy the text that starts with the line -----BEGIN CERTIFICATE REQUEST----- and ends with the line -----END CERTIFICATE REQUEST----- to the clipboard. | * Locate the CSR section on the page, and copy the text that starts with the line -----BEGIN CERTIFICATE REQUEST----- and ends with the line -----END CERTIFICATE REQUEST----- to the clipboard. | ||
| Line 57: | Line 56: | ||
* Log in to your [https://hosting.xmission.com Control Panel]. | * Log in to your [https://hosting.xmission.com Control Panel]. | ||
| − | * | + | * Click on the domain you wish to secure. |
| − | * Choose "''' | + | * Choose "'''SSL/TLS Certificates'''" under '''Security'''. |
| − | * Click on the | + | * Click on '''Download or remove existing certificates - Manage''' towards the bottom of the page. |
| + | * Click on the certificate you created | ||
* Your Certificate Completed Email should contain a Certificate and Intermediate Chain (CA Chain). You will need to copy the Certificate and Chain from the email you received past it in the provided boxes. | * Your Certificate Completed Email should contain a Certificate and Intermediate Chain (CA Chain). You will need to copy the Certificate and Chain from the email you received past it in the provided boxes. | ||
[[File:SSL_Email_Cert.png|600px]] | [[File:SSL_Email_Cert.png|600px]] | ||
| Line 69: | Line 69: | ||
== Assign your SSL Certificate == | == Assign your SSL Certificate == | ||
| − | * Now you need to assign the certificate to your site. | + | * Now you need to assign the certificate to your site. |
| − | * | + | * From the side menu bar choose "'''Websites and Domains'''". |
| − | [[File: | + | * Click on the domain you added the SSL Cert to |
| + | * Choose '''Hosting & DNS''' then choose "'''Hosting Settings'''". | ||
| + | [[File:PleskSSL-4.png|600px]] | ||
* Then check the box for SSL Support and select your certificate. | * Then check the box for SSL Support and select your certificate. | ||
| − | [[File: | + | [[File:PleskSSL-5.png|600px]] |
| + | * '''Certificate''' - this is where you select the certificate you created. | ||
* '''Optional''': Permanent SEO-safe 301 redirect from HTTP to HTTPS. This option makes it so your site can only be viewed on the secured page. If this isn’t selected, customers can still see the non-secure page unless the website is hard coded to perform this same function. | * '''Optional''': Permanent SEO-safe 301 redirect from HTTP to HTTPS. This option makes it so your site can only be viewed on the secured page. If this isn’t selected, customers can still see the non-secure page unless the website is hard coded to perform this same function. | ||
Latest revision as of 11:27, 8 December 2022
Contents
Creating CSR
SSL certificates secure transfer of sensitive data from visitors to your website, and also verify the site identity. Below you can find two lists of SSL certificates. The first one showing certificates that you use for securing your websites and the other one showing certificates that you purchased.
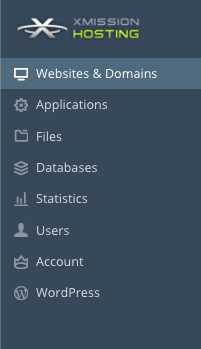
- From side panel click on "Websites and Domains".
- Click on the domain you wish to use your SSL Certificate on.
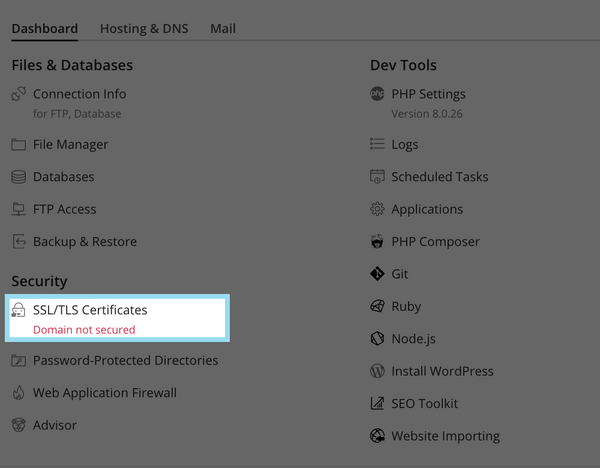
- Next choose "SSL/TLS Certificates" under Security.
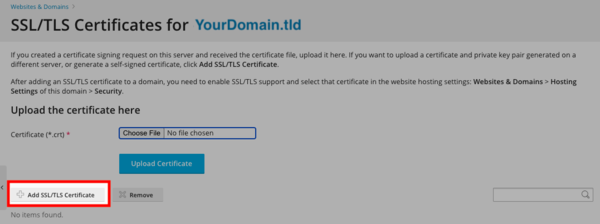
- To manage or add a CSR choose Download or remove existing certificates - Manage towards the bottom of the page.
- Next choose "Add SSL Certificate".
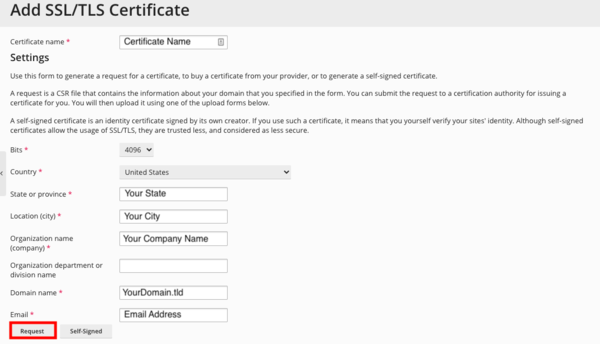
- Next fill in the form to generate a CSR then click "Request".
- Certificate Name: This will help you identify this certificate in the repository.
- Country: This is defaulted to United States.
- State or province: The state in which your company resides.
- Location(city): The city in which your company resides.
- Organization Name: This can be your company name.
- Organization Department: Website, IT or variations, should not exceed 64 characters.
- Domain name: The domain name you are looking to secure, ideally listed as the Fully Qualified Domain Name (FQDN). Example: your-domain.com or www.your-domain.com.
- Email: The website administrator's email address.
- NOTE: when ordering an SSL Certificate the validation email must match your domain with the following conditions:
- admin@<domain.tld>
- administrator@<domain.tld>
- hostmaster@<domain.tld>
- webmaster@<domain.tld>
- postmaster@<domain.tld>
- After you fill out the above form it will generate a CSR this is what you need to purchase a SSL Certificate.
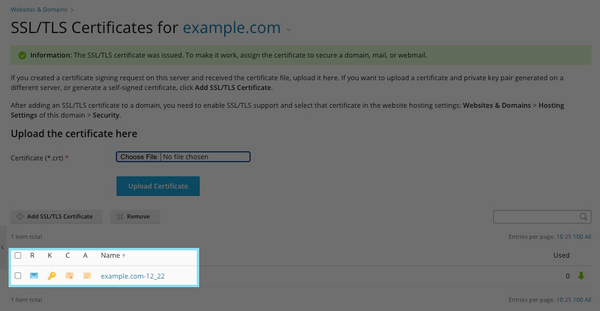
- Confirmation that your CSR was created:
Viewing your CSR
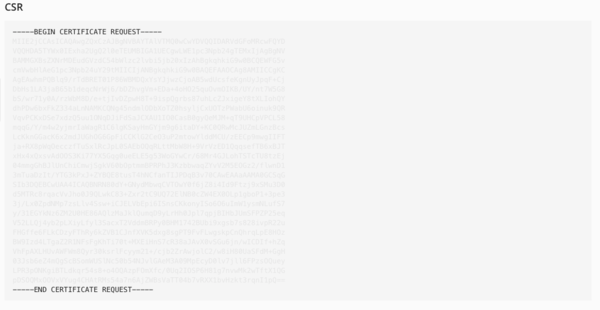
- Click on the Certificate name to view your CSR.
- Locate the CSR section on the page, and copy the text that starts with the line -----BEGIN CERTIFICATE REQUEST----- and ends with the line -----END CERTIFICATE REQUEST----- to the clipboard.
Installing SSL Certificate
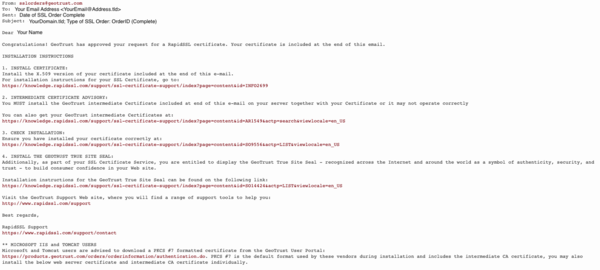
If you ordered your SSL Cert with XMission, you will receive an email to approve the creation of the certificate. Once you approve the process, another email will be sent to you with your Certificate.
- An example email should look like:
- Log in to your Control Panel.
- Click on the domain you wish to secure.
- Choose "SSL/TLS Certificates" under Security.
- Click on Download or remove existing certificates - Manage towards the bottom of the page.
- Click on the certificate you created
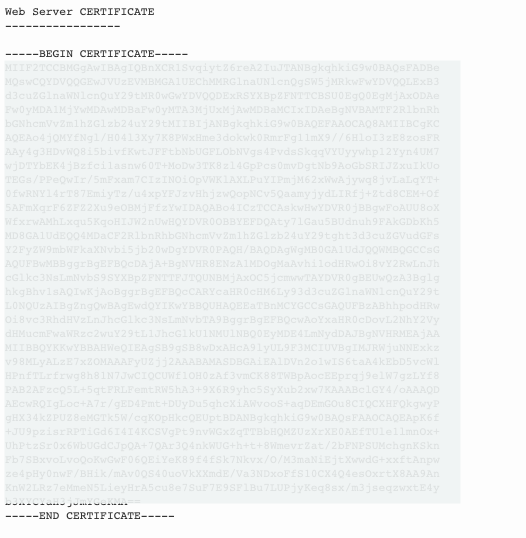
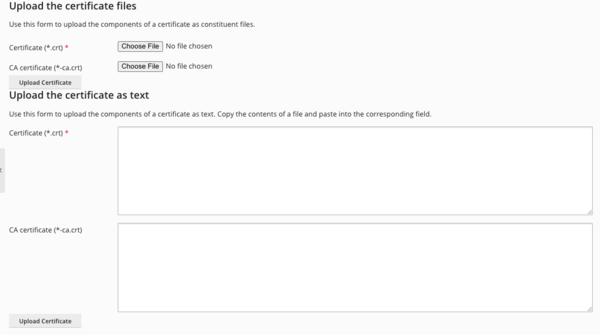
- Your Certificate Completed Email should contain a Certificate and Intermediate Chain (CA Chain). You will need to copy the Certificate and Chain from the email you received past it in the provided boxes.
- Be sure to include the "-----Begin Certificate-----" and "-----End Certificate-----" Be careful of having extras spaces or extra lines when copying them in. They can cause errors messages when you attempt to save.
Assign your SSL Certificate
- Now you need to assign the certificate to your site.
- From the side menu bar choose "Websites and Domains".
- Click on the domain you added the SSL Cert to
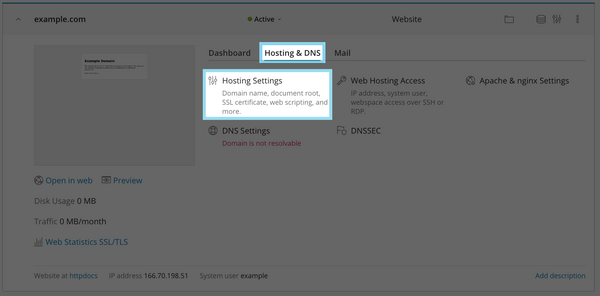
- Choose Hosting & DNS then choose "Hosting Settings".
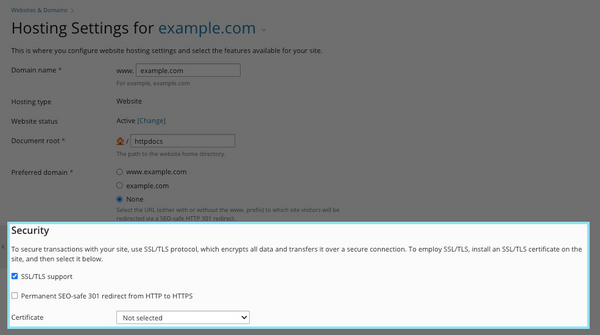
- Then check the box for SSL Support and select your certificate.
- Certificate - this is where you select the certificate you created.
- Optional: Permanent SEO-safe 301 redirect from HTTP to HTTPS. This option makes it so your site can only be viewed on the secured page. If this isn’t selected, customers can still see the non-secure page unless the website is hard coded to perform this same function.
- Click "OK" at the bottom.
After saving the changes, related services for the website will be automatically restarted. Within 1-3 minutes the new SSL certificate should be serving and displaying properly if you refresh the page.
- Administration/Logging in
- Adding a Domain
- Adding MySQL Databases
- Adding/Managing DNS Records
- Managing Domain/Users
- Managing FTP Access/Users
- PHP Settings
- Previewing the Website
- Secure Your Sites
- Web Statistics
Additional Development Help
Applications
Domain Management
